
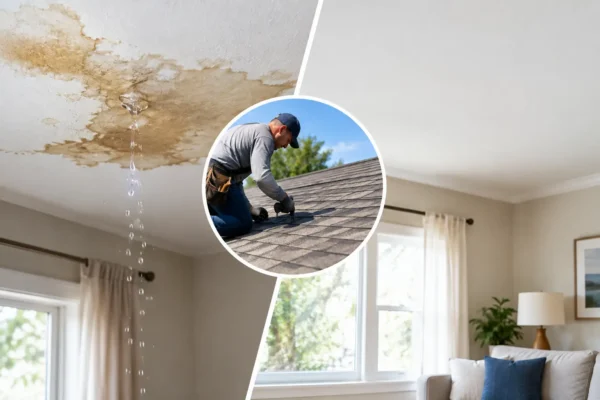

A ceiling stain after a Colorado Springs rainstorm can feel like a small problem until the drywall softens, insulation stays wet, or water reaches a light fixture. This roof leak repair example shows how a careful repair moves from the visible symptom inside the home to the actual failure point on the roof. The goal is not to cover up the stain. It is to stop water at its source and protect the structure underneath.
Consider a homeowner who notices a brown ring on the ceiling near a second-floor bedroom window. The stain appears after wind-driven rain, but the roof is not old enough to seem like an obvious concern. A quick look from the yard shows no missing shingles. That is exactly why roof leaks deserve a closer inspection. Water often enters in one location, follows framing or decking, and finally appears several feet away indoors.
A Roof Leak Repair Example, Step by Step
In this example, the roofer begins inside the attic. The ceiling stain is one clue, but damp insulation and a dark water trail on the roof decking point toward the roof slope above the bedroom. The contractor checks for active dripping, mold growth, soft wood, and any electrical hazards before moving outside.
On the roof, the shingles directly above the stain look intact. The problem is at a plumbing vent a few feet uphill. The rubber collar around the vent pipe has cracked from years of sun exposure and temperature changes. During a gentle rain, it may shed water well enough. During a hard, wind-driven storm, water can work through the cracked collar and beneath the surrounding shingles.
The repair involves removing the shingles around the vent carefully, taking out the damaged vent flashing, and inspecting the roof deck. In this case, the decking is still solid, so it does not need replacement. A new vent flashing is installed with the correct overlap, underlayment is restored where needed, and matching shingles are reinstalled and sealed according to the roofing system requirements.
Inside, the homeowner does not repaint immediately. The insulation is checked for saturation and the attic area is allowed to dry. If the drywall has only a light cosmetic stain and remains firm, a stain-blocking primer and paint may be enough once moisture readings are normal. If drywall is soft, sagging, or moldy, that section should be removed and repaired instead.
This is a relatively contained repair. The important part is that the contractor fixed the failed flashing component, not simply applied roof cement around the pipe. Surface sealant can sometimes serve as a short-term emergency measure, but it is rarely the best long-term answer for cracked or improperly installed flashing.
Why the Stain Is Not Always the Leak Location
Homeowners naturally look straight above a ceiling stain, but roofs do not always leak in a straight line. Water can travel along the underside of roof decking, framing members, nail holes, valleys, or insulation before it becomes visible. A leak near a chimney, skylight, vent, wall intersection, or valley may show up far from the actual opening.
That is why a proper inspection considers the full water path. A roofer should inspect the attic when it is safe to do so, examine the roof penetrations and transition areas, and look for signs of previous repairs that may have failed. On a steep roof or after a storm, this work is not a safe homeowner project. Wet shingles are slippery, and storm damage can create weak spots that are not visible from the ground.
In Colorado Springs, high winds, hail, snow, and strong sun all affect roofing materials. A roof may have several small issues at once: lifted shingles after wind, hail bruising that shortens shingle life, loose flashing, or sealant that has dried out. It depends on the age of the roof, the type of materials, the storm history, and whether the home has had repairs before.
Common Sources of Roof Leaks
Vent pipe flashing is a frequent culprit, but it is not the only one. Leaks also develop around chimney flashing, skylights, roof-to-wall intersections, valleys, ridge vents, and damaged shingles. Clogged gutters can worsen the problem by allowing water to back up along the roof edge, while ice dams can force water beneath shingles during freezing weather.
A leak can also come from something other than the roof. Condensation in a poorly ventilated attic, a plumbing leak, or failed siding and window flashing can create water marks that look like a roof issue. An honest contractor should identify the actual source instead of selling a repair that will not solve the problem.
What a Lasting Repair Should Include
A lasting roof repair starts with diagnosis. Once the source is confirmed, the work should address damaged materials and restore the layers that shed water. For a shingle roof, that can include replacing compromised shingles, underlayment, flashing, fasteners, and sealant where appropriate. If the decking is rotten, it must be repaired before new roofing materials go on top.
Material matching matters, especially on a newer roof. A repaired area should blend as closely as possible with the existing roof while maintaining the manufacturer’s installation requirements. Exact color matching is not always possible because shingles weather over time, but the repair should look neat and function as part of the complete roofing system.
A good contractor will also explain the condition of the surrounding roof. If one cracked vent boot is the only issue, a focused repair may be the right choice. If several areas show storm damage, widespread granule loss, brittle shingles, or recurring leaks, putting money into isolated patches may not provide good value. No shortcuts. No surprises. Homeowners deserve a clear explanation of both options.
When a Roof Leak May Involve Insurance
A sudden leak after hail, high winds, or a fallen branch may be part of a covered storm-damage claim. Normal aging, neglected maintenance, and gradual wear are often handled differently, so it helps to document what happened as soon as it is safe. Take photos of interior staining, exterior damage visible from the ground, and any fallen debris. Keep notes on the storm date and when you first noticed the leak.
Do not wait for a claim decision before protecting the home from further water intrusion. Temporary measures, such as professional tarping, can limit additional damage. Keep receipts and photographs of emergency work. Avoid signing broad agreements or approving a full replacement before you understand the scope of damage and your insurance responsibilities.
For homeowners who need guidance, Tither Roofing and Construction can inspect the damage, provide a straightforward assessment, and help coordinate the insurance process when storm damage is involved. The purpose is to make sure the repair scope reflects the condition of the home, not to make a stressful situation more complicated.
What to Do While You Wait for a Repair
If water is actively coming through the ceiling, move furniture, electronics, and valuables away from the area. Place a container under the drip and protect flooring with towels or plastic sheeting. If the ceiling is bulging, do not stand beneath it. A water-filled section of drywall can collapse without much warning.
Turn off electricity to the affected area if water is near light fixtures, outlets, or wiring, and contact a qualified professional. Do not climb onto a wet roof to investigate. From the ground, you can safely look for obvious missing shingles, displaced flashing, damaged gutters, or tree limbs, but leave close inspection and repair work to licensed, insured professionals.
A roof leak is easier and less expensive to address when it is caught early. Whether the repair is a cracked vent boot, lifted flashing, or storm damage that calls for a larger plan, a careful inspection gives you a path forward and helps keep a small stain from becoming a much bigger repair.